我使用的 openssl 版本为3.0.2,如图:

生成ca根证书准备:
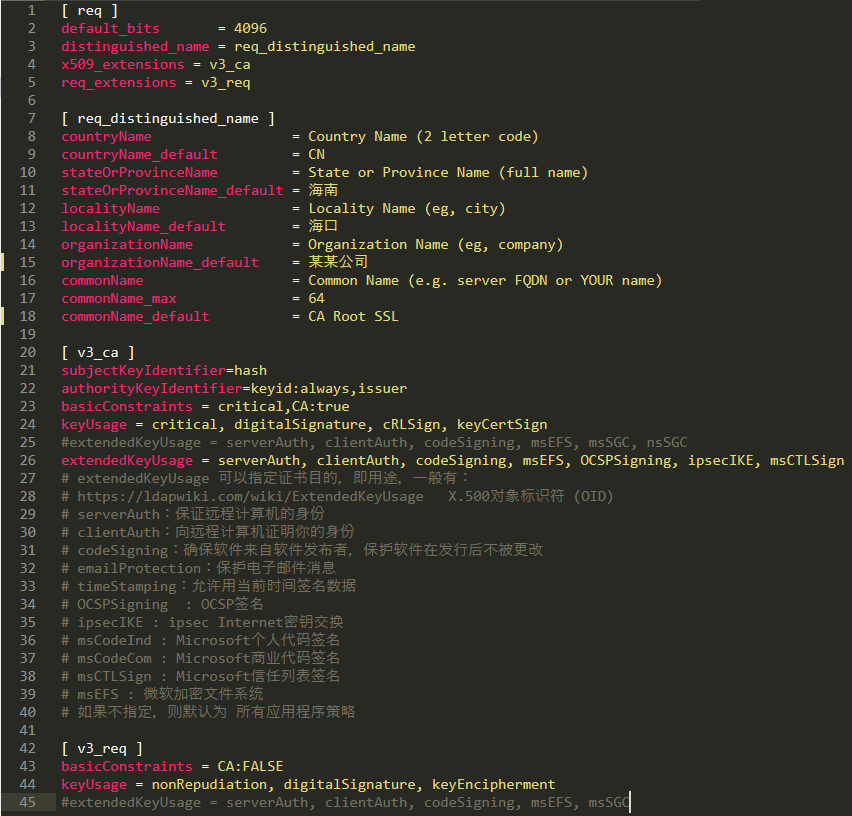
我把一些配置写入了配置文件 ca.conf ,内容如下:
[ req ]
default_bits = 4096
distinguished_name = req_distinguished_name
x509_extensions = v3_ca
req_extensions = v3_req
[ req_distinguished_name ]
countryName = Country Name (2 letter code)
countryName_default = CN
stateOrProvinceName = State or Province Name (full name)
stateOrProvinceName_default = 海南
localityName = Locality Name (eg, city)
localityName_default = 海口
organizationName = Organization Name (eg, company)
organizationName_default = 某某公司
commonName = Common Name (e.g. server FQDN or YOUR name)
commonName_max = 64
commonName_default = CA Root SSL
[ v3_ca ]
subjectKeyIdentifier=hash
authorityKeyIdentifier=keyid:always,issuer
basicConstraints = critical,CA:true
keyUsage = critical, digitalSignature, cRLSign, keyCertSign
#extendedKeyUsage = serverAuth, clientAuth, codeSigning, msEFS, msSGC, nsSGC
extendedKeyUsage = serverAuth, clientAuth, codeSigning, msEFS, OCSPSigning, ipsecIKE, msCTLSign
# extendedKeyUsage 可以指定证书目的,即用途,一般有:
# https://ldapwiki.com/wiki/ExtendedKeyUsage X.500对象标识符 (OID)
# serverAuth:保证远程计算机的身份
# clientAuth:向远程计算机证明你的身份
# codeSigning:确保软件来自软件发布者,保护软件在发行后不被更改
# emailProtection:保护电子邮件消息
# timeStamping:允许用当前时间签名数据
# OCSPSigning : OCSP签名
# ipsecIKE : ipsec Internet密钥交换
# msCodeInd : Microsoft个人代码签名
# msCodeCom : Microsoft商业代码签名
# msCTLSign : Microsoft信任列表签名
# msEFS : 微软加密文件系统
# 如果不指定,则默认为 所有应用程序策略
[ v3_req ]
basicConstraints = CA:FALSE
keyUsage = nonRepudiation, digitalSignature, keyEncipherment
#extendedKeyUsage = serverAuth, clientAuth, codeSigning, msEFS, msSGC
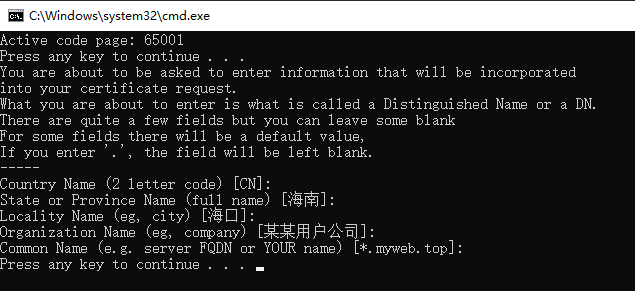
如图
为了方便,我把指令写入了 生成ca根证书.bat 这个文件中,文件编码我保存为utf-8,文件内容为:
chcp 65001
@echo off
::生成ca秘钥,得到ca.key
openssl genrsa -out ca.key 4096
pause
::生成ca证书签发请求,得到ca.csr
openssl req -new -utf8 -sha256 -out ca.csr -key ca.key -config ca.conf
pause
::生成ca根证书,得到ca.crt
openssl x509 -req -days 3650 -extensions v3_req -extensions v3_ca -extfile ca.conf -in ca.csr -signkey ca.key -out ca.crt
pause
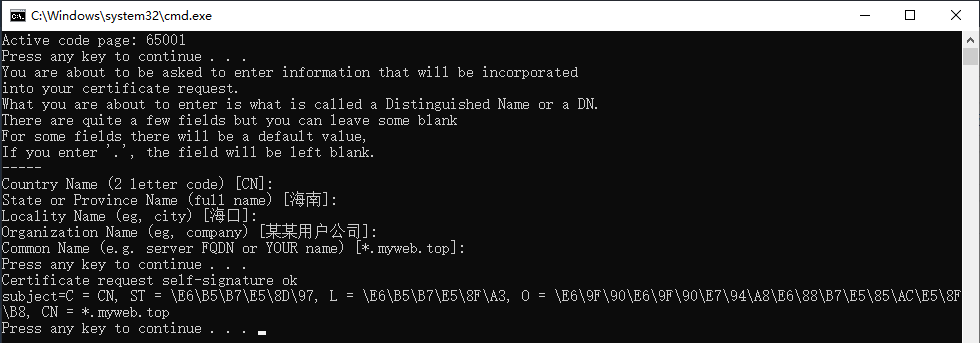
如图:

生成终端用户证书准备:
把生成终端用户证书的配置写入了 server.conf 这个配置文件中,配置文件内容为:
[ req ]
default_bits = 2048
distinguished_name = req_distinguished_name
req_extensions = req_ext
[ req_distinguished_name ]
countryName = Country Name (2 letter code)
countryName_default = CN
stateOrProvinceName = State or Province Name (full name)
stateOrProvinceName_default = 海南
localityName = Locality Name (eg, city)
localityName_default = 海口
organizationName = Organization Name (eg, company)
organizationName_default = 某某用户公司
commonName = Common Name (e.g. server FQDN or YOUR name)
commonName_max = 64
commonName_default = *.myweb.top
[ req_ext ]
keyUsage = nonRepudiation, digitalSignature, keyEncipherment, dataEncipherment, keyAgreement
extendedKeyUsage = serverAuth, clientAuth
subjectAltName = @alt_names
# extendedKeyUsage 可以指定证书目的,即用途,一般有:
# https://ldapwiki.com/wiki/ExtendedKeyUsage X.500对象标识符 (OID)
# serverAuth:保证远程计算机的身份
# clientAuth:向远程计算机证明你的身份
# codeSigning:确保软件来自软件发布者,保护软件在发行后不被更改
# emailProtection:保护电子邮件消息
# timeStamping:允许用当前时间签名数据
# 2.23.140.1.2.1 : 域名认证(DV)
# 2.23.140.1.2.2 : 组织认证(OV)
# 2.23.140.1.2.3 : 个人认证(IV)
# 如果不指定,则默认为 所有应用程序策略
[alt_names]
DNS.1 = admin.myweb.top
DNS.2 = www.myweb.top
DNS.3 = *.myweb.top
IP.1 = 126.168.1.101
IP.2 = 127.0.0.1
如图:
为了方便我把指令写入了 生成终端用户证书.bat 这个文件中,文件编码为utf-8,内容为:
@chcp 65001
@echo off
::生成秘钥,得到server.key
openssl genrsa -out server.key 2048
pause
::生成证书签发请求,得到server.csr
openssl req -new -utf8 -sha256 -out server.csr -key server.key -config server.conf
pause
::用CA证书生成终端用户证书,得到server.crt
openssl x509 -req -days 732 -CA ca.crt -CAkey ca.key -CAcreateserial -in server.csr -out server.crt -extensions req_ext -extfile server.conf
pause
如图:

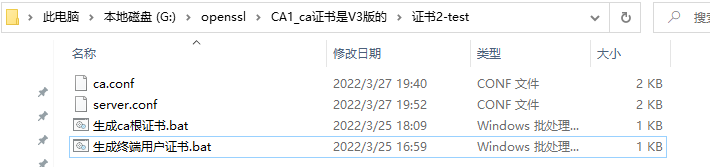
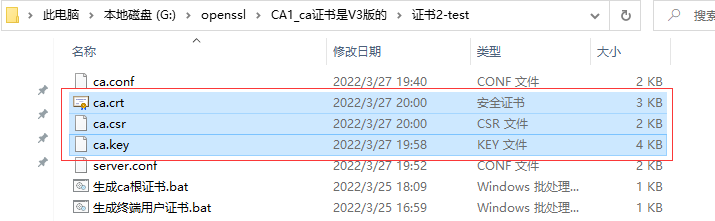
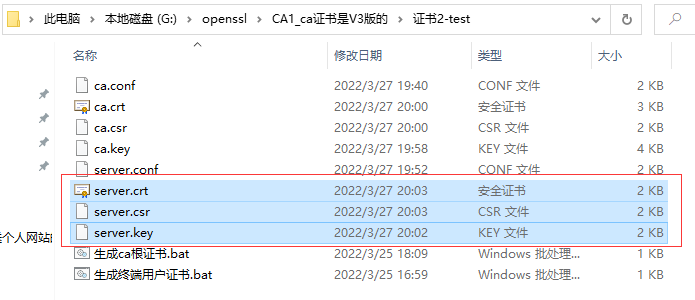
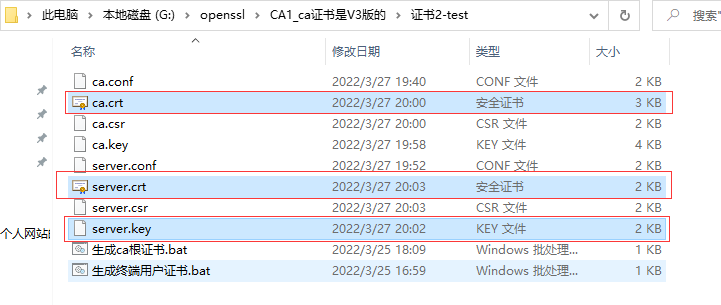
目录一览:
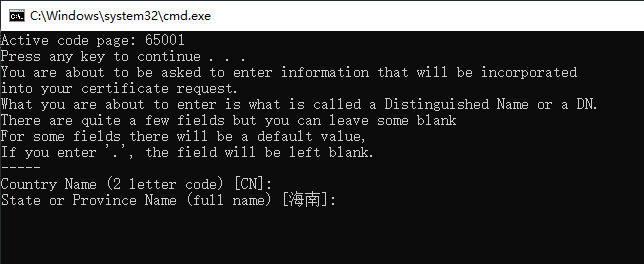
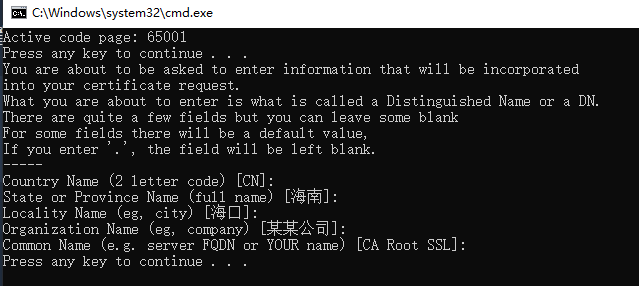
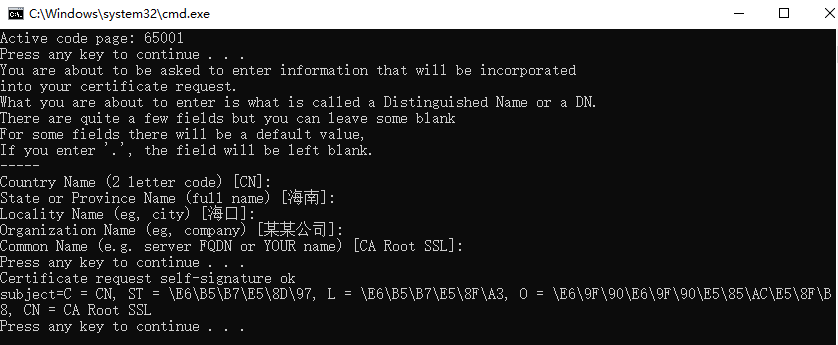
现在双击 生成ca根证书.bat 执行这个脚本,如图:

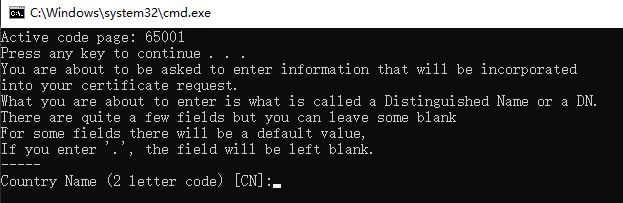
一路点回车就行了
接下来双击 生成终端用户证书.bat 执行这个脚本,如图:

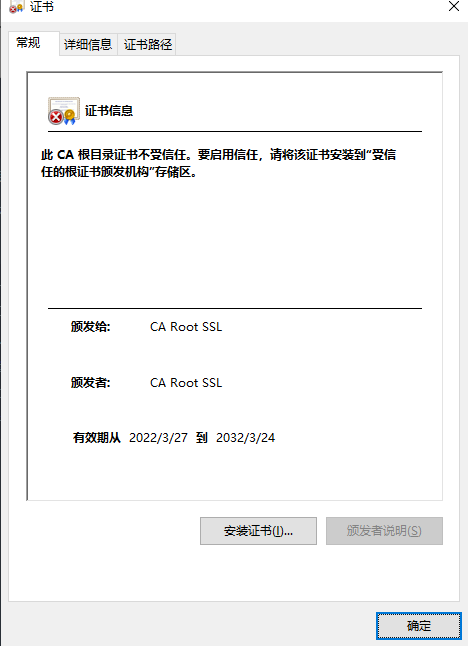
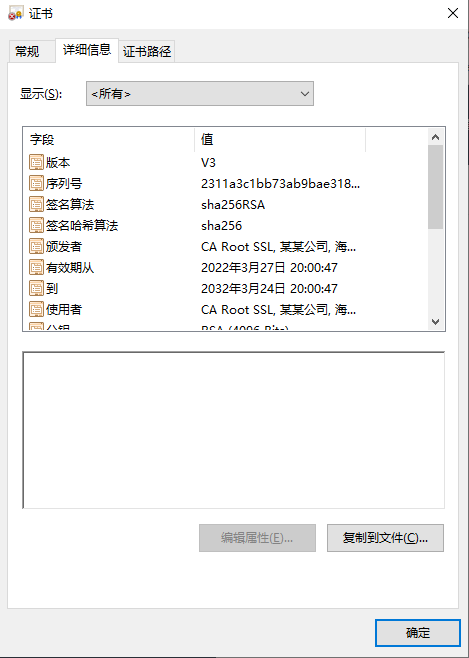
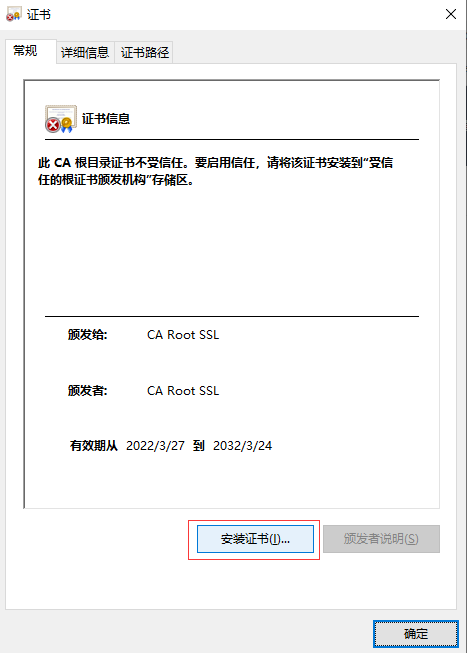
查看ca证书,点击打开 ca.crt 这个文件:
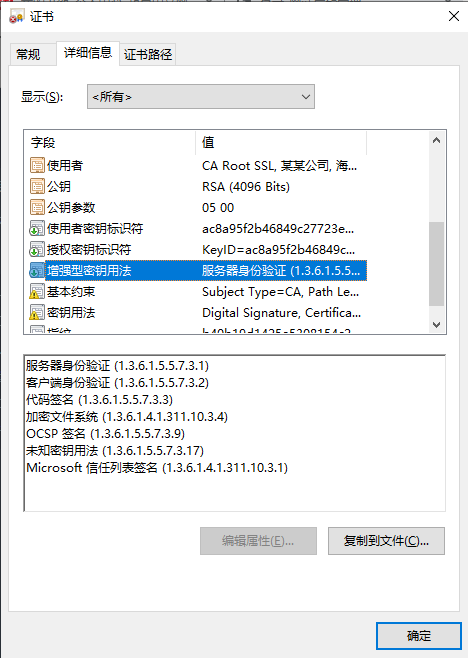
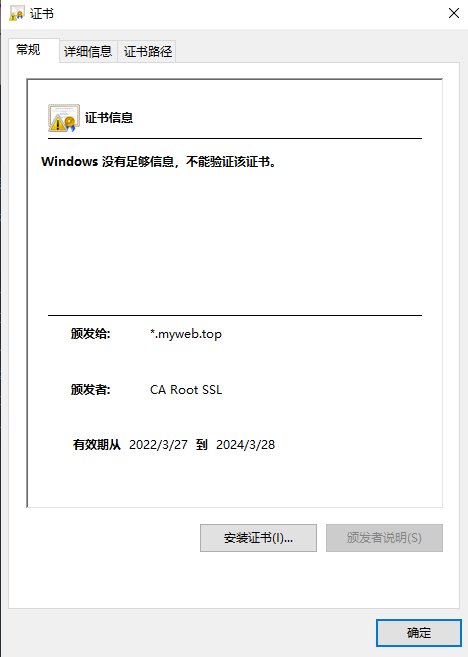
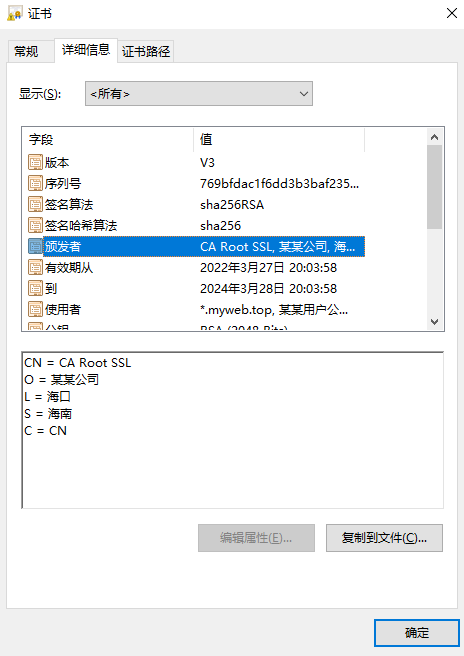
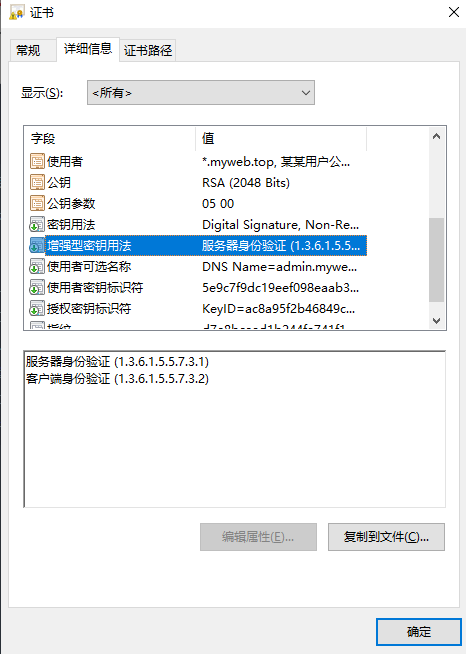
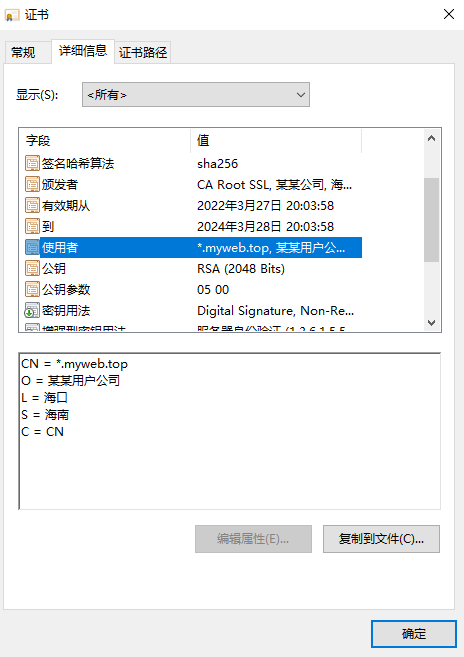
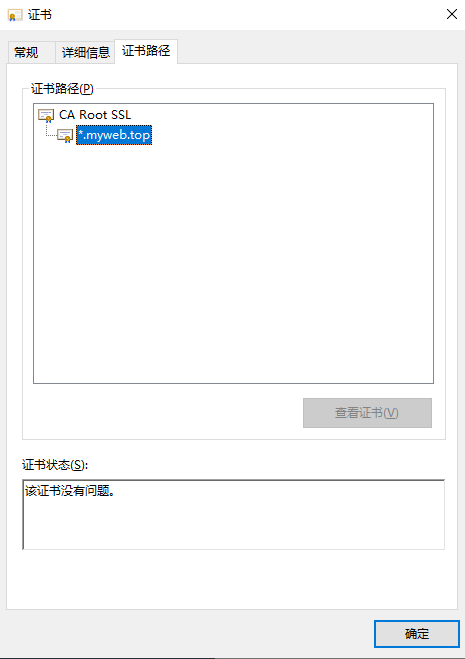
查看终端用户证书,点击打开 server.crt 这个文件:

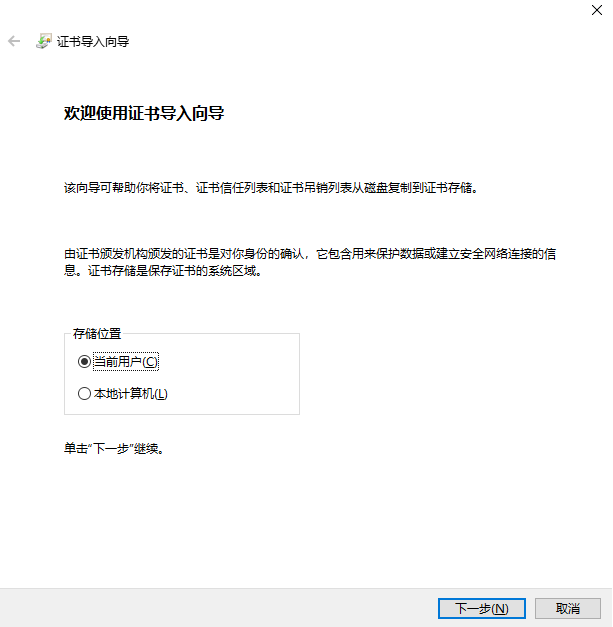
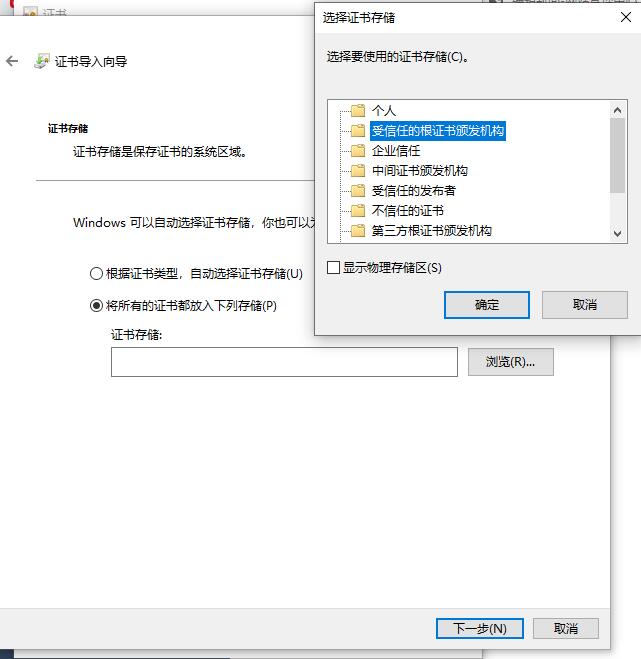
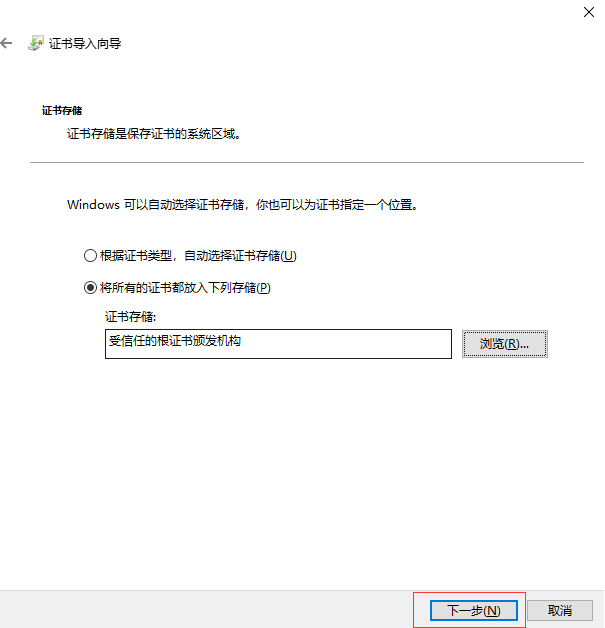
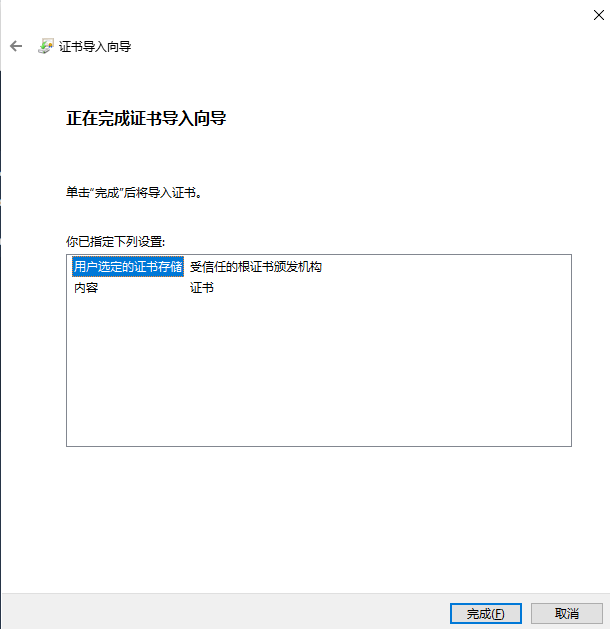
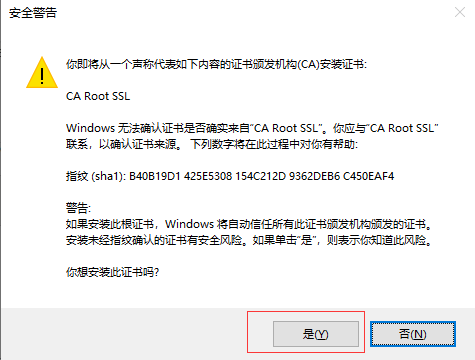
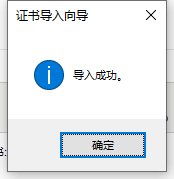
把ca.crt 这个证书添加到 「受信任的根证书颁发机构」
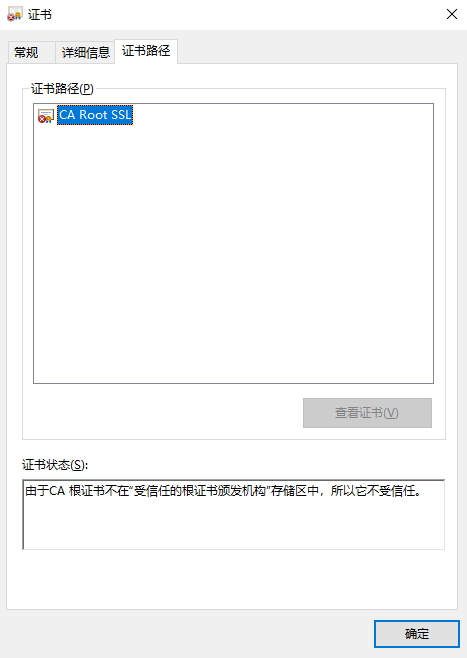
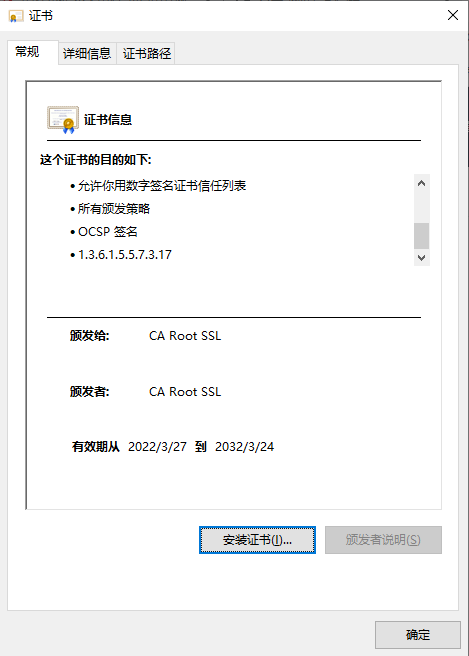
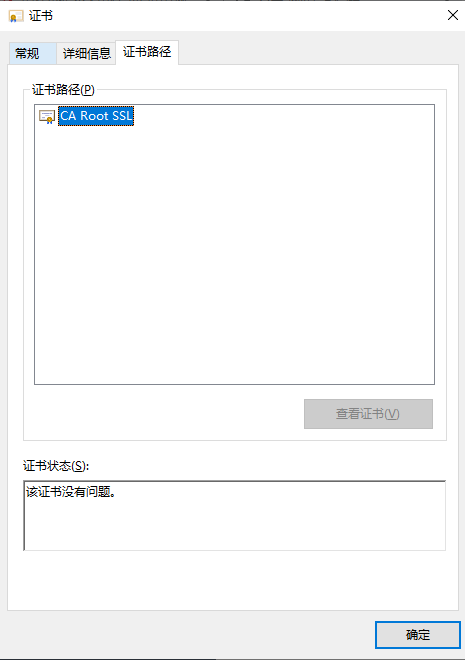
重新打开ca.crt这个证书:

再重新打开 终端用户证书 server.crt,如图
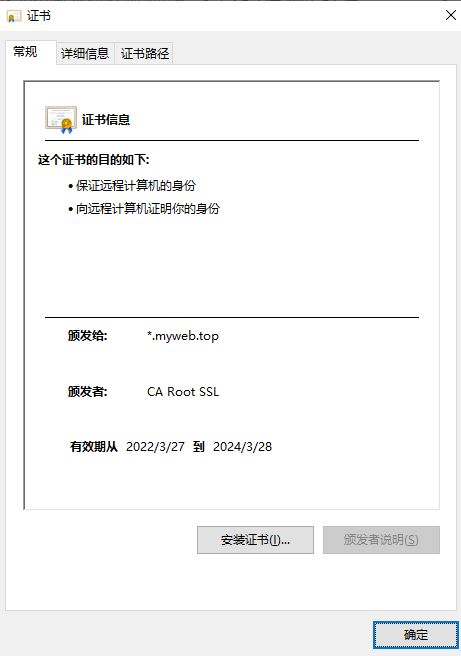

好了,证书生成完毕 。
。
配置 https ,我使用的是Apache
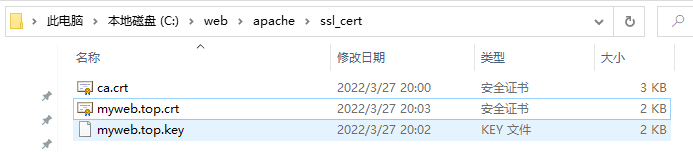
我先把生成的文件 ca.crt,sever.crt,server.key 复制到路径 C:\web\apache\ssl_cert ,并把文件 server.crt 重命名为 myweb.top.crt ,把文件 server.key 重命名为 myweb.top.key 如图:
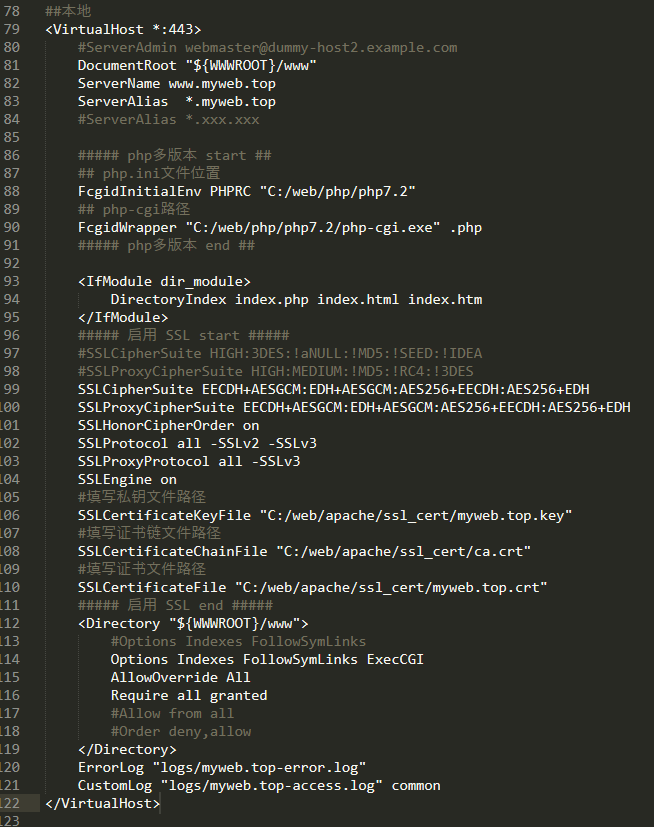
apache虚拟主机配置如下:
<VirtualHost *:443>
#ServerAdmin webmaster@dummy-host2.example.com
DocumentRoot "${WWWROOT}/www"
ServerName www.myweb.top
ServerAlias *.myweb.top
#ServerAlias *.xxx.xxx
##### php多版本 start ##
## php.ini文件位置
FcgidInitialEnv PHPRC "C:/web/php/php7.2"
## php-cgi路径
FcgidWrapper "C:/web/php/php7.2/php-cgi.exe" .php
##### php多版本 end ##
<IfModule dir_module>
DirectoryIndex index.php index.html index.htm
</IfModule>
##### 启用 SSL start #####
#SSLCipherSuite HIGH:3DES:!aNULL:!MD5:!SEED:!IDEA
#SSLProxyCipherSuite HIGH:MEDIUM:!MD5:!RC4:!3DES
SSLCipherSuite EECDH+AESGCM:EDH+AESGCM:AES256+EECDH:AES256+EDH
SSLProxyCipherSuite EECDH+AESGCM:EDH+AESGCM:AES256+EECDH:AES256+EDH
SSLHonorCipherOrder on
SSLProtocol all -SSLv2 -SSLv3
SSLProxyProtocol all -SSLv3
SSLEngine on
#填写私钥文件路径
SSLCertificateKeyFile "C:/web/apache/ssl_cert/myweb.top.key"
#填写证书链文件路径
SSLCertificateChainFile "C:/web/apache/ssl_cert/ca.crt"
#填写证书文件路径
SSLCertificateFile "C:/web/apache/ssl_cert/myweb.top.crt"
##### 启用 SSL end #####
<Directory "${WWWROOT}/www">
#Options Indexes FollowSymLinks
Options Indexes FollowSymLinks ExecCGI
AllowOverride All
Require all granted
#Allow from all
#Order deny,allow
</Directory>
ErrorLog "logs/myweb.top-error.log"
CustomLog "logs/myweb.top-access.log" common
</VirtualHost>
重启apache,浏览器访问:
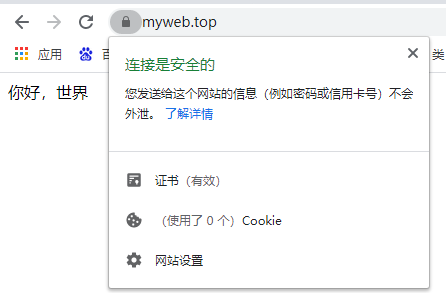
我是安装了ca根证书到 “受信任的根证书颁发机构”,谷歌浏览器才这样展示。
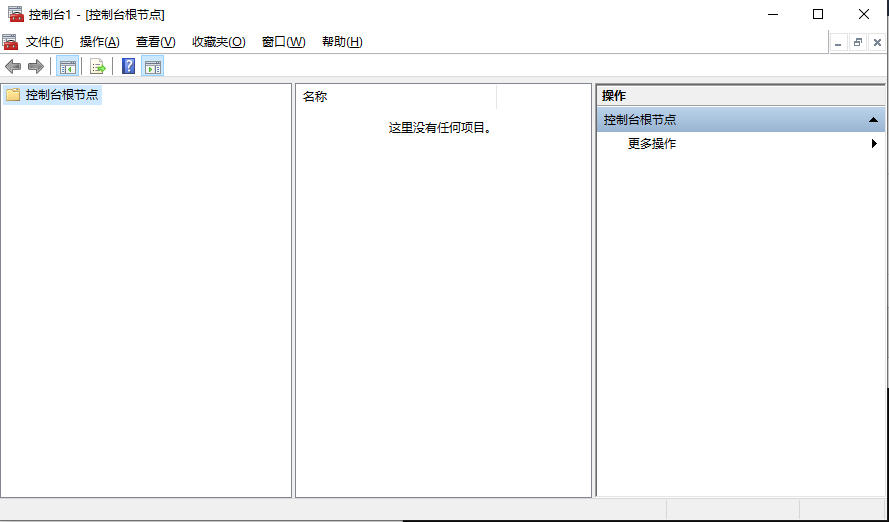
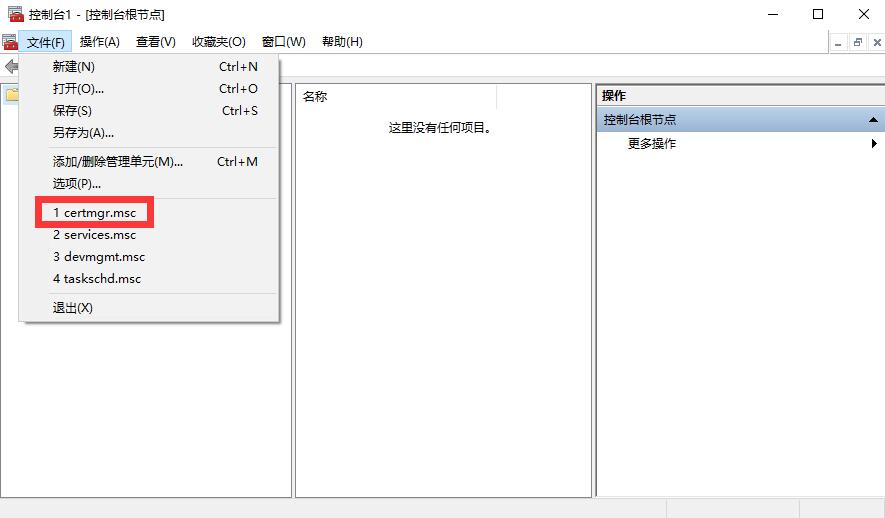
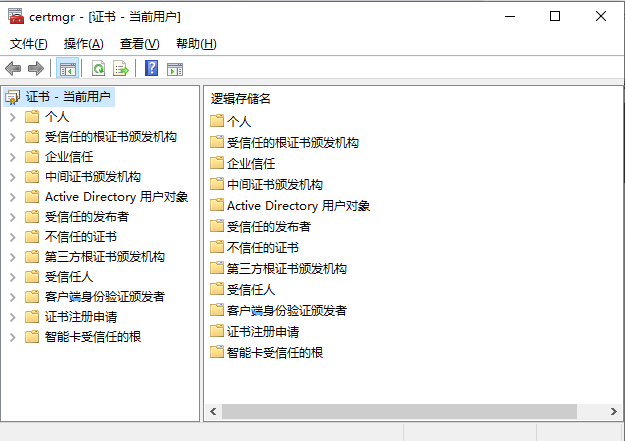
打开证书管理工具,运行 里输入 certmgr.msc 或者cmd输入命令行 mmc
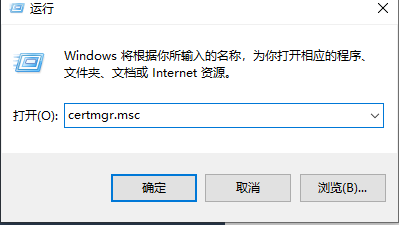
cmd输入命令行 mmc

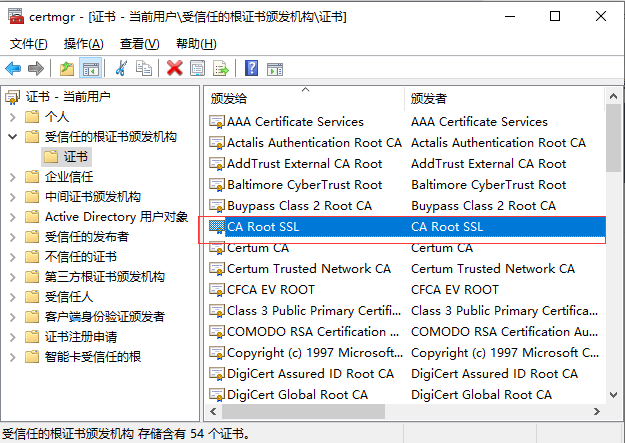
看到了刚刚添加的ca根证书。